QR code error correction and logo placement are the two design decisions that determine whether a branded code scans instantly or fails in front of a customer. In practical terms, error correction is the built-in redundancy that lets a QR code remain readable when part of its pattern is covered, scratched, resized poorly, or printed on difficult materials. Logo placement is the controlled insertion of a brand mark, icon, or badge into the code without disrupting the finder patterns, timing patterns, alignment structures, and contrast needed for reliable decoding. Together, these factors sit at the center of logo integration in QR codes, especially for marketing teams that want a code to look on-brand while still working across phones, scanners, print sizes, and lighting conditions.
I have worked on QR campaigns for packaging, menus, retail displays, event badges, and direct mail, and the same lesson appears every time: visual customization only succeeds when scan performance comes first. A beautiful code that does not scan is not branding; it is friction. A plain code that scans instantly can outperform a stylized one in conversion, but with disciplined design you can usually achieve both. That is why this topic matters. A QR code often acts as the bridge between offline attention and online action. If the code breaks because the logo is too large, placed over critical modules, or paired with inadequate error correction, the user experience ends before the landing page loads.
To understand logo integration in QR codes, it helps to define the key limits. Standard QR codes support four error correction levels: L, M, Q, and H. These levels allow roughly 7 percent, 15 percent, 25 percent, and 30 percent of codewords to be restored, though real-world recoverability depends on where damage occurs and how the code is generated. Covering the center of a code with a logo does not mean you can safely hide exactly 30 percent of the image. The decoder still needs structural patterns, clean edges, adequate quiet zone, and sufficient contrast. In other words, error correction creates design room, not unlimited freedom. Understanding that boundary is what separates dependable branded QR design from guesswork.
How QR code error correction actually works
QR codes use Reed-Solomon error correction, a mathematical method that adds redundant codewords so a scanner can reconstruct missing or corrupted data. The practical takeaway is straightforward: the more redundancy you add, the more visual interference the code can tolerate, but the denser the symbol becomes. Higher density means smaller modules, and smaller modules are harder to scan when the code is reduced in print, viewed at a distance, or captured by a lower quality camera. This tradeoff matters because many teams choose the highest correction level by default, then compress too much data into the symbol, then add a logo, gradients, and rounded modules, and finally wonder why scan rates drop on outdoor signage or corrugated packaging.
In field testing, I treat error correction as one control inside a larger system. Data length, output size, print method, substrate, color choice, and expected scan distance all influence whether the correction reserve is enough. A short dynamic URL encoded at level H can remain highly resilient even after moderate center coverage. A long vCard or a heavily parameterized URL at the same level may become too dense to survive the same treatment. This is why dynamic QR codes are often better for branded use: they keep payloads short, preserve larger modules, and allow destination updates without reprinting. The code image becomes simpler, and simpler symbols are more forgiving when a logo is introduced.
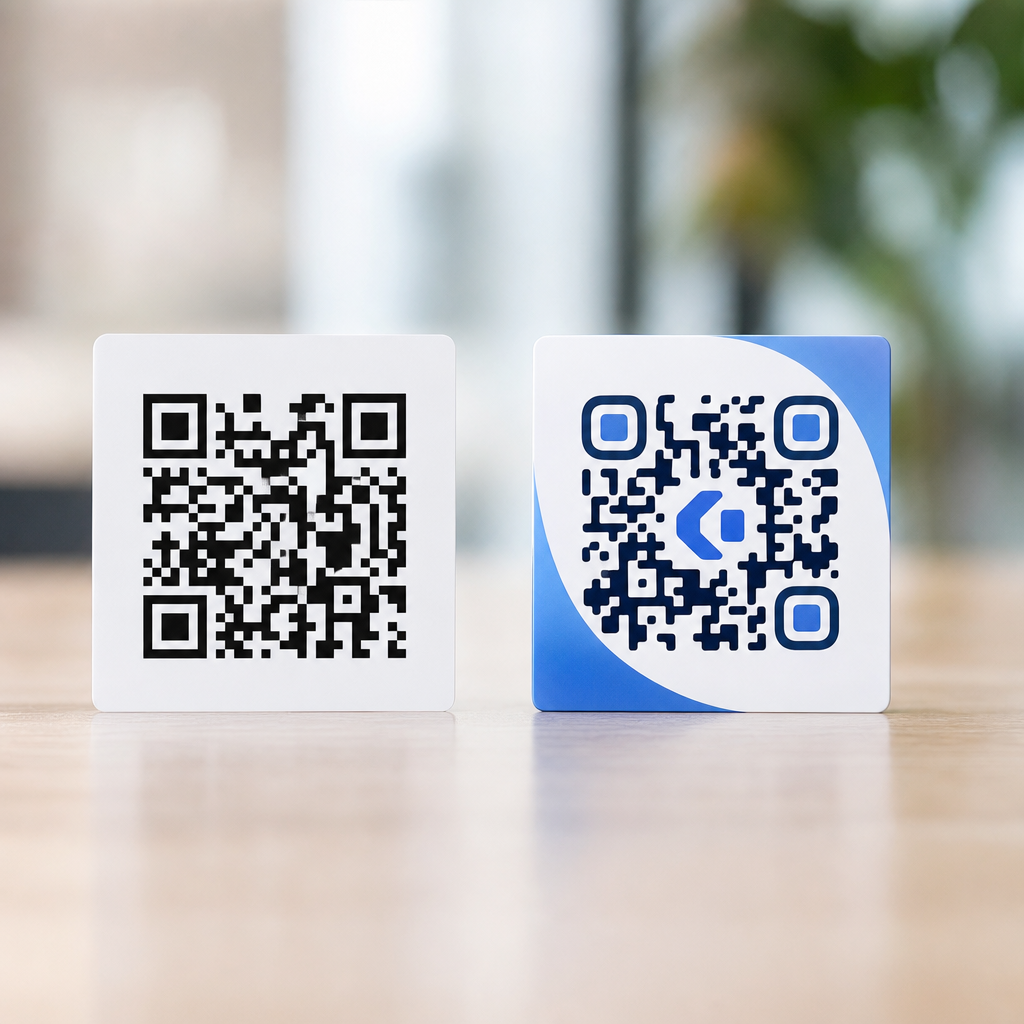
Another common misunderstanding is that all damaged areas are equal. They are not. Obscuring random modules may be recoverable; blocking a finder pattern in a corner usually is not. Timing patterns and alignment patterns also help the scanner map the grid. If these structures are interrupted, the code may fail even if the total blocked area seems small. The safest logo integration strategy uses the central area because the main finder patterns live in three corners. Even then, central placement should avoid aggressive oversizing and should preserve strong contrast around the logo window so the decoder can distinguish surrounding modules clearly.
Best practices for logo placement in QR codes
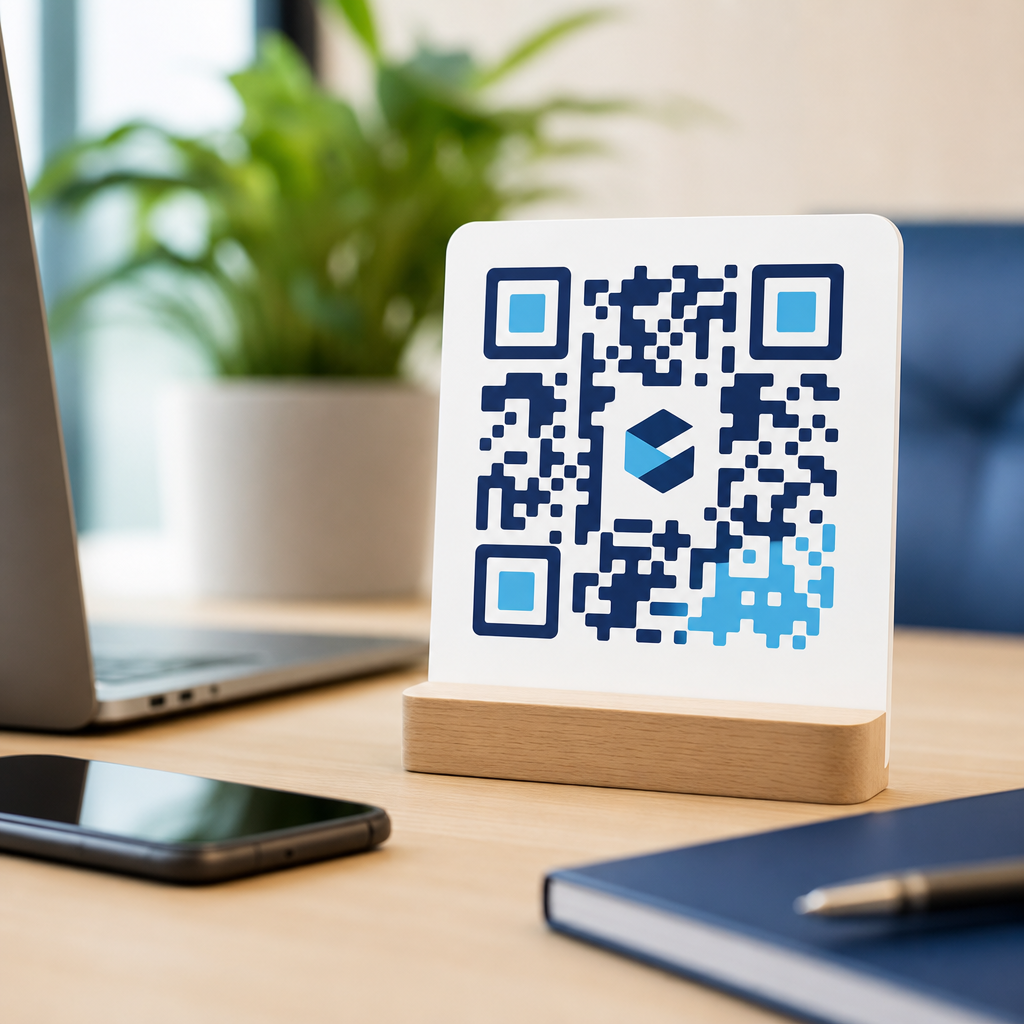
The safest answer to the question, “Where should a logo go in a QR code?” is the center, sized conservatively, with high error correction and adequate clear separation from surrounding modules. Center placement works because it avoids the three large finder patterns that scanners use first. In production, I usually start with a logo occupying about 15 percent of the total code area and test upward carefully rather than assuming a bigger mark will still scan. Many successful branded codes stay in the 10 to 20 percent range. Once the logo approaches a quarter of the visible symbol, failure rates rise quickly unless the payload is very short and the output size is generous.
Shape matters as much as size. A simple square or circle logo block is easier to account for than an irregular mark with fine detail. If the logo includes thin lettering, those details often disappear at small sizes and create visual noise that competes with the modules. A solid white underlay behind the logo is usually beneficial because it isolates the mark from the pattern and prevents the brand artwork from reducing local contrast. However, the white knockout should not sprawl far beyond the mark itself. Excessive blanking removes too many modules, effectively enlarging the obstruction beyond the visible logo and consuming the redundancy budget faster than expected.
Quiet zone discipline is equally important. Every QR code needs a clear margin around the symbol, typically four modules wide, free from text, borders, background patterns, or packaging seams. Teams sometimes leave the center logo modest but place the code inside a decorative badge that crowds the edges. The result is a scan failure blamed on the logo when the real problem is an inadequate quiet zone. For print, I also recommend avoiding glossy lamination over dark modules when possible. Reflections can wash out contrast, especially under retail lighting, and the scanner may struggle even though the code looked perfect on a monitor during approval.
| Design factor | Recommended starting point | Why it matters |
|---|---|---|
| Error correction level | H for most logo QR codes | Provides the largest redundancy reserve for center coverage and minor print damage |
| Logo area | 10% to 20% of total code area | Keeps branding visible without consuming too much recoverable space |
| Logo position | Centered | Avoids finder patterns in the corners and simplifies predictable masking |
| Quiet zone | Minimum 4 modules on all sides | Helps decoders detect the symbol boundary quickly and accurately |
| Color contrast | Dark modules on light background | Improves recognition across phones, scanners, and inconsistent lighting |
| Payload type | Short dynamic URL | Reduces density, producing larger modules and stronger scan tolerance |
How data density, size, and styling affect scannability
When teams discuss logo integration in QR codes, they often focus only on the visible logo and overlook data density, which is usually the hidden cause of weak performance. QR version size expands as data increases. More data means more modules. More modules in the same printed dimensions mean each module becomes smaller. Once modules get too small for the print method, camera distance, or motion blur involved, the scanner has less tolerance for any disruption, including a logo. This is why a dynamic short link can rescue a design that keeps failing as a direct long URL. You are not just changing the destination architecture; you are simplifying the symbol itself.
Module styling introduces another layer of risk. Rounded dots, custom eyes, gradients, and brand colors can work, but they reduce the margin for error. In my experience, the safest customization sequence is this: first lock the payload and correction level, then validate a plain black-and-white code, then add the logo, and only after that test stylistic changes one by one. If everything is changed at once, troubleshooting becomes impossible. You cannot tell whether failure came from a low-contrast dark blue, over-rounded modules, an oversized center mark, or a print vendor that softened the edges. Controlled iteration is the only reliable way to preserve both brand appearance and scanning speed.
Physical output conditions matter as much as digital previews. On flexible packaging, ink spread can thicken modules and narrow gaps. On fabric, texture can break edges. On storefront glass, reflections and transparency complicate the background. On television or LED displays, refresh patterns and moiré can interfere with camera capture. A logo that scans on a desktop mockup may fail in one of these contexts even with level H correction. For that reason, minimum physical size should be set based on use case, not aesthetics alone. A code on business cards may scan well at a much smaller size than a code on a poster intended to be scanned from six feet away.
Testing, validation, and common failure patterns
The best branded QR code is not the prettiest file exported from a design tool; it is the one that passes repeatable testing before launch. I recommend testing across at least iPhone and Android devices, native camera apps, and the actual environments where scans will occur. If the code will be used in stores, test under store lighting. If it will appear on shipping cartons, test on the final corrugate with the intended ink coverage. If it will be shown on screens, test brightness settings and viewing angles. A code that works only when held perfectly under office light is not production ready.
Common failure patterns are predictable. The first is an oversized logo that blocks too many modules. The second is low contrast, such as medium gray modules on a beige background or a brand color too close in luminance to white. The third is a missing or contaminated quiet zone, often caused by placing text, icons, or decorative frames too close to the edges. The fourth is excessive data density from encoding too much information directly. The fifth is over-stylization, especially when rounded modules, custom eyes, gradients, and transparency are stacked together. None of these issues is mysterious, and all are preventable with disciplined generation and testing.
Use professional generators and validators when possible. Tools that expose version, masking, and correction settings offer far more control than casual web widgets. Print teams also benefit from preflight checks that confirm vector output, contrast, and minimum size. If analytics matter, route scans through a dynamic platform so performance can be measured by placement, campaign, or channel. That visibility often reveals an uncomfortable truth: a slightly less decorative code can produce materially better scan-through rates. The goal is not to remove branding. It is to place branding where it helps recognition without weakening the core function of the symbol.
Building a durable logo integration workflow
As a hub within QR code design and branding, logo integration in QR codes should be approached as a repeatable workflow rather than a one-off art task. Start by defining the scan context: print or screen, expected distance, lighting, material, and user urgency. Then keep the payload short, preferably with a dynamic URL. Choose error correction deliberately, with H as the usual starting point for branded codes. Add the logo in the center with a controlled white underlay. Preserve the quiet zone. Maintain strong contrast. Test plain first, then customized, then production proofs. Document the final specifications so future campaigns do not repeat earlier mistakes or rely on subjective judgment from different stakeholders.
It also helps to separate brand priorities into negotiables and nonnegotiables. Usually the nonnegotiables are scan speed, destination accuracy, and accessibility across common devices. The negotiables are logo size, corner styling, module shape, and color treatment. Once teams agree on that hierarchy, approval cycles become faster because everyone understands that visual expression sits inside technical limits. That mindset leads to better outcomes: codes that feel branded, look intentional, and still perform on packaging, signage, direct mail, menus, badges, and product inserts. If you are refining your broader QR branding system, start by auditing existing codes against these principles and update the weakest performers first.
QR code error correction and logo placement are not separate topics; they are the operating rules for successful branded scanning. Error correction creates the tolerance that makes a center logo possible, but it does not excuse oversized artwork, crowded margins, weak contrast, or dense payloads. The most reliable logo integration in QR codes follows a simple pattern: short data, high contrast, adequate quiet zone, conservative center placement, and real-world testing before release. Get those fundamentals right, and the code can carry branding without sacrificing usability. Review your current branded QR codes, test them under real conditions, and tighten the specifications anywhere scan performance depends on luck instead of design discipline.
Frequently Asked Questions
What does error correction mean in a QR code, and why is it so important when adding a logo?
Error correction is the built-in recovery system inside a QR code that allows scanners to read the data even when part of the code is damaged, obscured, distorted, or intentionally covered by a design element such as a logo. QR codes use Reed-Solomon error correction to rebuild missing or unreadable portions of the symbol. In plain language, that means the code can still scan even if some modules are hidden by a brand mark, affected by glare, softened by low-quality printing, or worn down through handling.
This matters enormously for branded QR codes because every visual customization introduces some level of scanning risk. A plain black-and-white code usually preserves the clearest possible structure, but once a logo is placed in the center, colors are adjusted, or the code is printed on textured packaging, the margin for error becomes smaller. Error correction is what gives designers room to customize without immediately breaking functionality. The higher the error correction level, the more damage or obstruction the code can tolerate, but the tradeoff is increased pattern density, which can make the code more complex and harder to scan at small sizes.
In practical use, error correction is one of the main reasons a logo can be added at all. Without sufficient redundancy, even a modest central graphic could block critical data modules and cause failed scans. That is why error correction should never be treated as a decorative setting. It is a functional engineering decision that directly affects scan reliability, especially in real-world conditions where codes may be printed small, viewed on mobile screens, exposed to poor lighting, or placed on curved or reflective materials.
Which QR code error correction level should you choose for a branded QR code with a logo?
QR codes generally offer four standard error correction levels: L, M, Q, and H. Level L recovers the least data loss, while Level H provides the most redundancy. For branded QR codes that include a logo or central badge, designers commonly favor Q or H because those levels provide a stronger buffer when part of the code is intentionally covered. In many commercial applications, H is the safest starting point when the logo is a prominent part of the design.
That said, the best choice is not always simply “use the highest setting.” Higher error correction increases the number of modules required to encode the same content, which makes the QR pattern denser. A denser code can become harder to scan if it is printed too small, displayed on low-resolution surfaces, or viewed from a distance. If the encoded data is long, such as a full URL with tracking parameters, the code may become visually busy very quickly at higher correction levels. In those situations, using a short dynamic URL can reduce data load and make high error correction more practical.
A strong rule of thumb is to match the correction level to the amount of visual interference and the realities of the placement. If the logo is modest, the print size is generous, and the environment is controlled, Q may be enough. If the code will appear on packaging, signage, menus, labels, or outdoor materials where damage, glare, motion, and imperfect printing are likely, H is often worth the added complexity. The right decision comes from balancing three factors: how much of the code is being altered, how small the final code will be, and how difficult the scanning conditions will be in real life.
Where should a logo be placed in a QR code so it looks branded without breaking scanability?
The safest and most common logo position is the center of the QR code, because it avoids the three large finder patterns located in the corners. Those corner squares are essential for detection and orientation, and scanners rely on them to recognize the symbol quickly. The timing patterns and alignment structures also need to remain intact, so a logo should never intrude into those functional areas. Center placement works because it allows a controlled interruption in the data area while keeping the code’s detection framework clear.
Even with center placement, the logo should be treated as a carefully sized overlay rather than a decorative object dropped onto the code at random. If it is too large, it can block more data than the selected error correction level can safely recover. If it has an irregular shape, weak contrast, transparent edges, or blends into the surrounding modules, it may create ambiguous patterns that confuse scanners. Many successful branded QR codes place the logo inside a solid white backing or “knockout” area to separate the mark from the modules around it. That visual buffer can improve readability while also making the branding cleaner and more intentional.
The broader principle is that logos should occupy the least amount of critical space needed to achieve recognition. A small, crisp, high-contrast logo in the center generally performs better than a large artistic mark pushed close to structural patterns. Good placement is less about visual preference and more about preserving the scanner’s ability to identify the QR code’s geometry instantly. When in doubt, keep the finder patterns, quiet zone, timing patterns, and other core structures untouched, and treat the center as the only practical area for controlled branding.
How large can a logo be inside a QR code before it starts causing scan failures?
There is no single universal percentage that guarantees success, because logo tolerance depends on several variables at once: the error correction level, the total amount of encoded data, the code version, the final print size, the contrast ratio, and the quality of the output surface. A logo that scans perfectly in one code may fail in another simply because the second code contains more data and therefore has a denser module pattern with less room for interruption.
In practice, many designers begin conservatively and keep the logo area relatively small compared with the full symbol, then test upward only if necessary. A logo that feels visually modest often performs much better than one designed to dominate the code. The goal is not to maximize logo size; it is to maximize instant recognition and successful scans. If the logo requires a background shape, border, or padding, all of that counts toward the obstructed area, not just the visible mark itself.
The most reliable approach is to use high error correction, shorten the encoded content, keep strong contrast, and then test the exact final design in real-world conditions. Scan it on multiple phone models, from different distances, under different lighting, and from both print and screen if it will appear in both places. Also test after resizing, because a logo that works on a large poster may fail on a small product label. The tipping point is not defined by aesthetics alone; it is defined by whether the code still scans quickly and consistently for ordinary users without requiring perfect alignment or repeated attempts.
What other design rules should you follow to make sure a QR code with a logo still scans instantly?
Error correction and logo placement are only part of the equation. A branded QR code also needs a proper quiet zone, which is the empty margin around the code that helps scanners separate it from surrounding graphics and text. If that clear space is crowded by packaging elements, borders, patterns, or background imagery, scan performance can drop sharply even when the code itself is technically valid. Protecting the quiet zone is one of the simplest and most overlooked ways to improve reliability.
Contrast is equally important. Dark modules on a light background remain the strongest standard because scanners detect that pattern most easily. Stylish color choices can work, but low contrast combinations, gradients, glossy finishes, metallic inks, shadows, and transparent overlays often reduce readability. Distortion is another common problem. Stretching a QR code non-proportionally, placing it on highly curved surfaces, or exporting it at low resolution can break the clean module edges scanners expect. Vector output, sufficient size, and careful print production are essential, especially for packaging and signage.
Finally, always validate the finished code in context, not just in a design file. Test it after printing, after placement on the actual material, and in the lighting and viewing conditions customers will experience. A code on a matte menu behaves differently from one on a glossy bottle, a backlit kiosk, or a storefront window. If the code links to a long URL, use a short or dynamic destination to reduce data density. If the design includes a logo, confirm that the finder patterns remain untouched and the code still scans quickly on older as well as newer devices. The best branded QR codes are not just visually attractive; they are engineered, tested, and optimized for effortless real-world scanning.